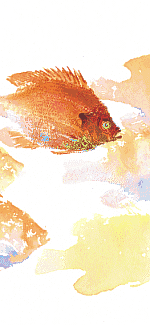
spritzingOne of the great thing about rubber
stamps is that you can, with proper execution,
get a good, clean, precise image. One of the bad
things about rubber stamps is that exact same
quality! Too many folks get hung up on exactness
and pristine execution and we forget that art,
like life, is a messy, sloppy, gooey infusion of
enthusiasm and creativity. The idea behind this
section centers on the use of these tactilely
interactive vulcanized tools for the replication
of graphic imagery (yes, I have WAY
too much time on my hands!) to create images are
very suggestive of watercolor.
Several water-based markers or watercolor paints
can be applied to the printing surface of a
stamp. A good "spritzing" of water from
a fine-spray atomizer is aimed at the rubber and
when the water beads up and starts to look like
it will run off the printing surface, you touch
the stamp to your paper. (Don't mash it into the
paper! You want the water and the pigmentation to
float on top. This is how the effect of one color
flowing into the other occurs.) What you get are
marvelous watercolor-type effects that have to do
with shapes on the rubber image and not the
specific detail. These shapes are good for
suggestive and evocative imagery. The mind is
more engaged when it has to fill in some of the
pieces of an image.
You can also use a positioner to
layer on more colors and shapes found on the
rubber. After an initial print is made and left
to dry, align the positioner and leave it in
place as you add more color to the rubber,
spritz, and layer up more over that initial
image. Start light in your color choices and
gradually build and build and build. It's
possible to create images that look like you're a
whiz with watercolor! (A positioner is a
registration device that allow you to put a
stamped image anywhere you want with precision.
If you are unfamiliar with one, ask your local
stamp or craft supply store for a demonstration.)
We notice things because of their differences. We
can take this truism, apply it to the spritzing
idea and create a whole field of diffused images
that start noticeably and fade into the
background. After you apply pigmentation to the
rubber, spray and make that first print, you add
more water again and again to the stamp in the
same manner and make more prints. (Don't just
spray one time and then stamp until dry; keep
adding water in-between each impression.
Otherwise you get a weak print of the details on
your stamp, instead of a watery, suggestive
image.) This spreads the remaining ink around and
creates a whole series of these diffused images
that will gradually get lighter and lighter as
the ink diminishes. Most people who have played
with watercolor know that to lighten a particular
paint or pigment you usually add more water to
it. This is essentially the same principal for
this approach.
After you have let your field of images dry,
again use a positioner to make a print over one
of these diffused shape. This time, ink up the
rubber properly and lay a crisp, detailed image
down. Since all of our diffused images lack
detail and gradually lighten in value, by
focusing attention on one particular image we can
visually "bring it to the front" and,
thereby, "push" the others to the back
and further our sense of depth. Depending on the
type of ink that is used to make this detailed
print, we can add additional color with either
markers, watercolor or colored pencils. This has
the potential of focusing our attention even more
to this main image and really make is stand out
amongst our field of suggestive, non-specific imagery.
Click over to a full blown run-through of a project utilizing
this technique:
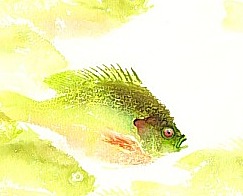
Also a link to the class schedule.
copyright © 2017 Fred B. Mullett

|
|