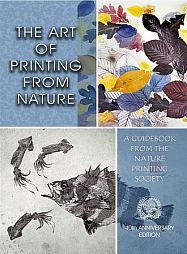
nature printing The breadth of this subject is beyond the scope of both my experience and the space available here. As the man once said, "There are as many forms of nature printing as there are printers." (Nature Printing Society info) What follows, however, are a few basic techniques for working with flora to help get you started. Perhaps the most readily available
source for nature print imagery is the leaves and plants of our
everyday surroundings. In that direction, there are a few simple
beginner materials you'll need to gather in order to start: As you walk through the neighborhood, stroll down a path in the woods nearby, or tend your garden, look at the leaves on the plants you see. Many would make perfect printing subjects. As fascinating as the colors might be, what counts in printing is the shape and the texture. Select a few that you would like to try and place them in between the pages of the phone book that you have (oh so conveniently!) brought with you. This is a form of plant press that is most suitable for the beginner; it helps to flatten the leaves and pull away some of the excess moisture. Though the time necessary to achieve the best results will vary with each different type of leaf, I would consider beginning with only a few hours of pressing at most. If they are pressed too flat, you lose some of the texture; not flat enough, and they might shift when inking. You'll just have play it by ear. Once back in your studio - and you and the subject are ready to print - begin by setting up your work area: work surface covered with newspaper in front, sheet of window glass or plexi-glass off to the side, inks, rollers, and paper ready to go. (Note: If using glass, wrap the edges with tape to prevent possible injury.) Place a small amount of ink on the sheet of window glass and roll out a thin layer at least 1" larger on all sides than the size of the leaf you'll be working on. (If you work with water-based inks, you'll have to work fairly fast as they can dry very rapidly. This is especially true of acrylics, but it is possible.) Remove the leaf from your "phone book-plant press" and carefully place in the center of the inked area. Gently roll more ink onto the top of the leaf, being studious to cover all areas evenly. Using the tweezers, carefully turn the leaf over and ink the bottom to make sure both sides are treated equally. Again, you want to make sure all surfaces are covered with an even amount of ink, but not so much that it goes "squish" under pressure when you print. Making sure your hands are totally free from any renegade ink smears, place a piece of paper on a clean section of your work surface. Although there are many types of beautiful paper for this type of work, great results can be achieved with the humble sheet of bond-weight paper. It's readily available, inexpensive, and has a smooth surface that holds great detail in the print. Pick up the inked leaf with the tweezers and gingerly - if not fredly - place it onto the paper. (Don't worry for now with composition. This is just practice.) Again, check your fingers for ink! Place another sheet of paper over the top. Firmly, evenly, and gently rub the leaf through the back of the top sheet of paper. When finished, lift off the top sheet and set it aside. Pick up the leaf and place it off to the side. Remove the second print from the work surface and...Voilà! Zee masterpiece!! Two of them, as a matter of fact. Cool! That one leaf can yield many,
many prints, but I'm sure once you get the hang of it you'll find
yourself uncontrolled in your desire to practice with all different
types and sizes of flora. |

Suggested reading list
Nature Printing Society
website